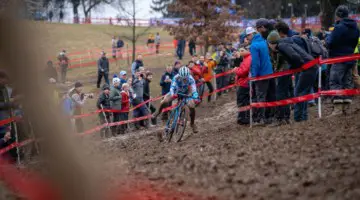
A Case Study: Alpenrose Cyclocross Clinic Number 2: A Coach’s Perspective
Here, Martin Baker, a coach with the Cross Crusade pre-season clinics, shares his perspective on the benefit of a good cyclocross clinic with us. (This article was originally published in Issue #1)
by Martin Baker
Every year in September, various organizers and participants in Portland, Oregon’s Cyclocross Crusade kick off the season with a series of  Wednesday evening clinics. Aimed at first-timers and veterans alike, the clinics have seen growth in participation that mirrors the growth of the Cross Crusade itself. This season, the first clinic attracted a staggering 149 participants, most of them relative newcomers to the sport. For week two, I was lucky enough to be able to help out with some of the coaching duties and ended up having a very rewarding experience.
Since turnout was again quite large, I found the biggest group and jumped in to see if I could help the three regular coaches, Jeff Struck, Kristina Hargie, and Matt Mahoney. This was the “Beginner but Not First-Timer” group and it numbered 60+ riders by my estimate.
Things kicked off with a few minutes of warming up on the bike, a little dismounting, and some barrier practice—a review of the previous week, essentially. It quickly became apparent that many riders found themselves hesitant with their dismounts as the barrier approached, and apprehensive while running the barriers. As a result the coaches elected to break the movement into its basic elements and have the riders tackle each individually.
First up was the dismount. Coach Jeff Struck offered up a nice smooth demo that clearly showed the hand on the top-tube, step-through, unclipping motion, and first couple of steps with the bike. After a few questions, practice ensued.
Keys to remember for the participants were:
- Begin the dismount early
- Be smooth
- Press through the top-tube with your right hand to help un-weight your left foot and make unclipping easier
- Conserve energy by lifting the bike no higher than necessary
- Lift the bike with the elbow to the inside of the saddle
Next, the coaches decided to address some of the anxiety with the barriers themselves. To reduce complexity and to allow riders to concentrate on good form, this exercise was completed without bikes. Again Jeff demonstrated running the barriers smoothly, keeping good rhythm and not wasting energy. Participants followed suit, improving quickly.
The important points from this exercise were as follows:
- Don’t jump the barrier, run the barrier
- Maintain a consistent gait through the barriers
- Think smooth before fast
- Don’t lead with your heel
The group was then split into two groups with a single barrier each so everyone could practice the movements together with plenty of room. At this point, improvement was obvious.
Some of the points that came out of this session, in addition to those previously mentioned, were the following:
- Keep the bike relatively vertical as you carry it
- Put the bike down gently with both wheels to avoid bouncing
- Don’t lift the bike off the ground until you are within a step or two of the barrier
- Don’t carry the bike too far away from the body
Since a couple of riders had asked about shouldering, at this point time was taken to do a quick static demonstration and to talk about various options for dealing with different frame shapes and geometries. Proper practice of shouldering techniques was tabled until week three and the group moved on to the dreaded remount to allow for some end-to-end practice. Jeff began the demonstration with a couple of full-speed remounts, but then slowed it down to walking speed. The goal was to push off with your left foot in one motion and slide the right inner thigh onto the saddle for the remount. Stutter step avoidance was of utmost importance. Riders began practicing on a slight downhill before turning around and adding a little speed on the uphill.
The following points were stressed:
- Start slow before speeding up
- If you stutter-step, slow it down and practice more
- Use your inner thigh as the contact point, not your “squishy bits”
- Don’t jump up and land on the saddle
- Push the bike forward slightly to allow your right leg to come around from behind the saddle
Again the group was split and riders given the opportunity to “put it all together,” barriers and all.
As previously, improvement among the riders was obvious, but a few additional items came to light.
- If the area after the barriers is bumpy, don’t be afraid to add a step or two to find smoother terrain for the remount
- Try to be consistent in speed or accelerating throughout the dismount/run/remount process
- Smooth and consistent should be the goal before fast
- Beginning the dismount early is no slower than waiting until the last moment
At this point, daylight had all but expired and barriers and cones were being collected so the session had to end. From my perspective, everyone seemed to have a good time, students and coaches alike, and both parties benefited and improved. It’s especially rewarding to see the click and watch a student “get it.” That’s why we do this!
For anyone thinking about organizing a session like this or interested in coaching, I offer these general observations/tips:
- Have everything set up before-hand
- Start on time
- Split groups into manageable sizes of like skill levels
- Team coaching allows for more personal attention
- Start each week with a review and practice of the previously taught skills
- Break complex movement patterns into small chunks and practice them separately
- Don’t try to do too much at one time
- Keep people moving, while allowing appropriate time for demonstrations and questions…AND…have fun!

